


SCANGRIP
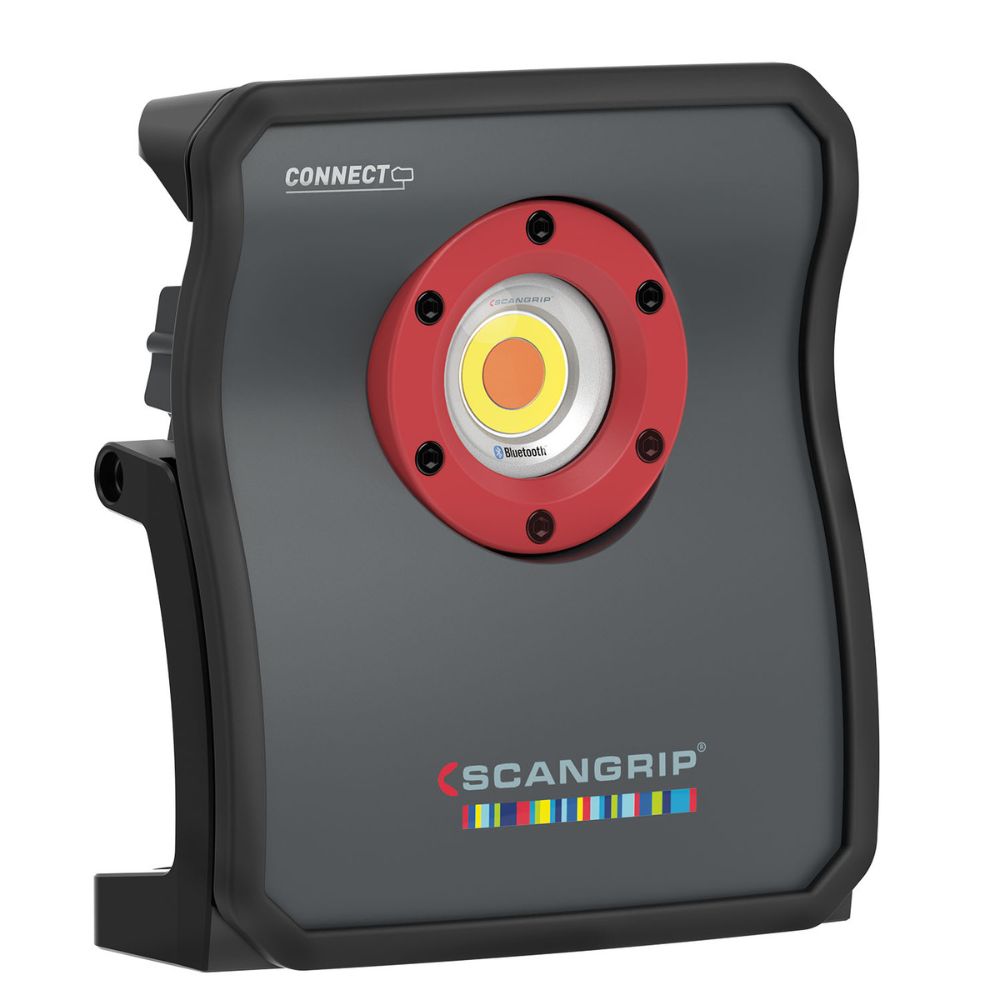
Scangrip Multimatch 3 Connect Detailing Light
Free Shipping For Orders Above $150.00 – Conditions Apply
Same Day Dispatch On Orders Placed Before 10am
Available In:
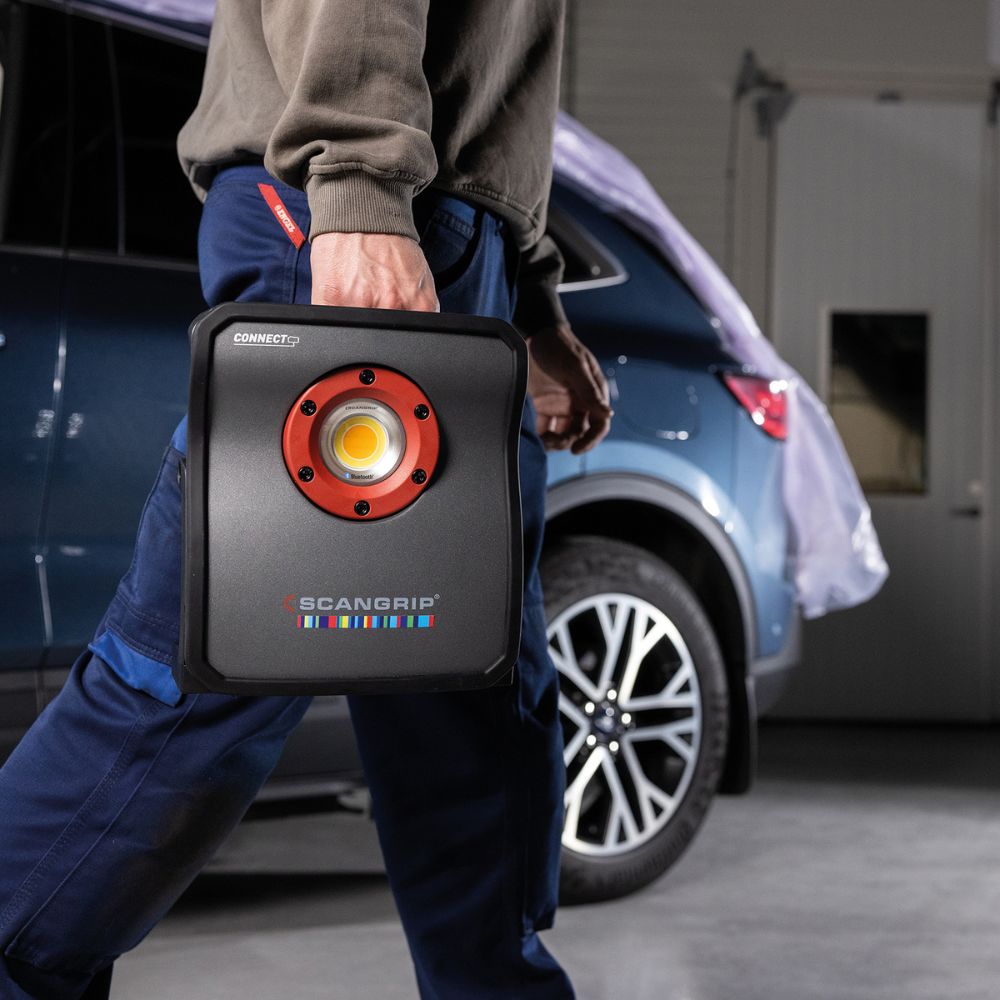
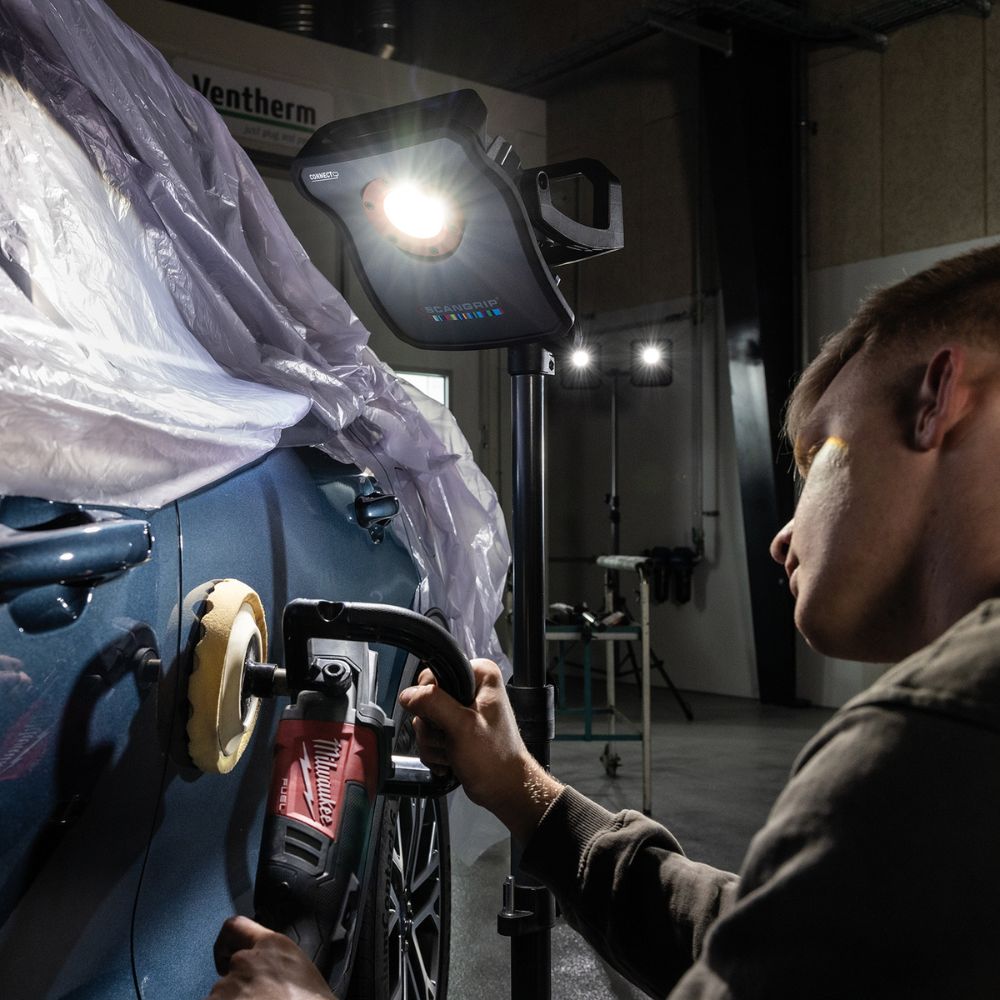
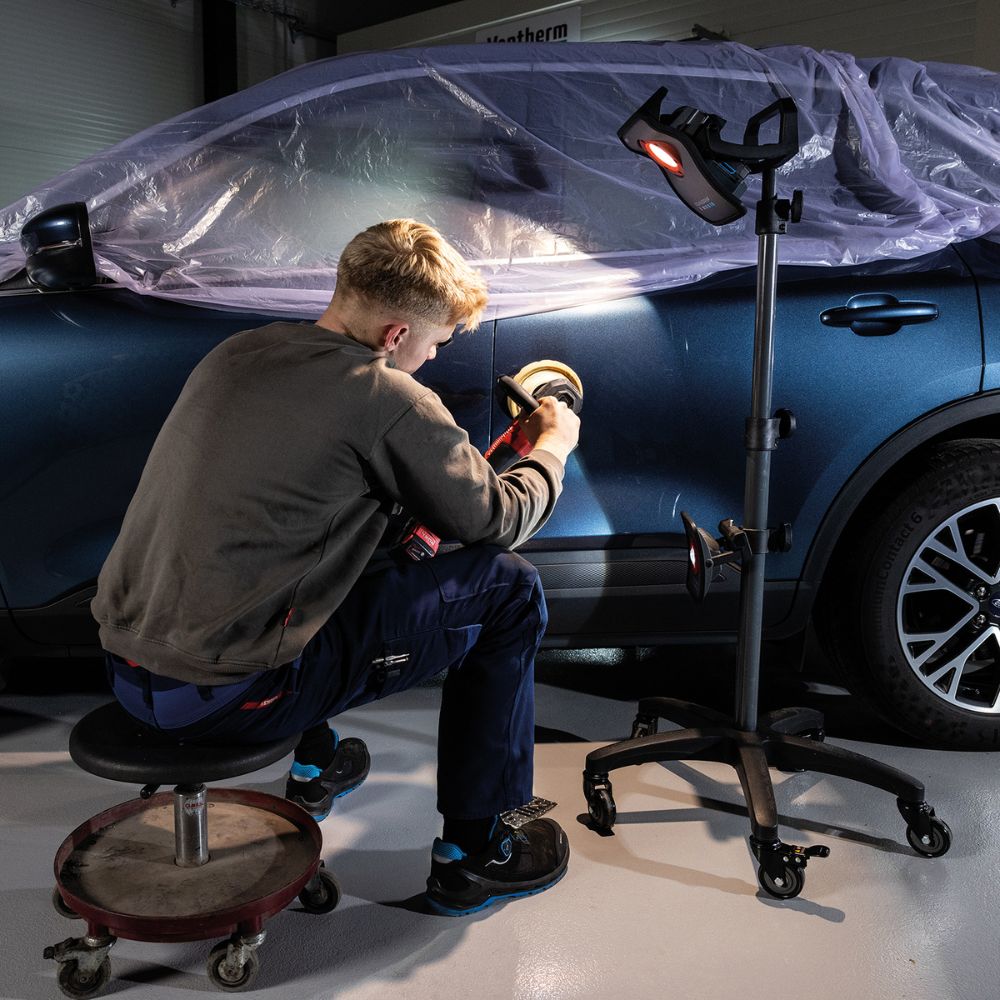
The SCANGRIP MULTIMATCH 3 CONNECT is a high-output, colour-accurate inspection light designed for detailing and paintwork where seeing the true finish matters. Built around CRI+ lighting and CCT SCAN, it helps reveal swirls, sanding marks, holograms, and surface defects across larger panels during polishing, painting, cleaning operations, and colour matching.
Key features
- Up to 3000 lumen for strong, even inspection lighting
- CRI+ output for more accurate colour recognition and defect visibility
- CCT SCAN (2500K to 6500K) sweeps colour temperature so you can lock in the best contrast for the job
- 5-step dimmer for quick brightness control
- Bluetooth light control for convenient adjustment of output and colour temperature
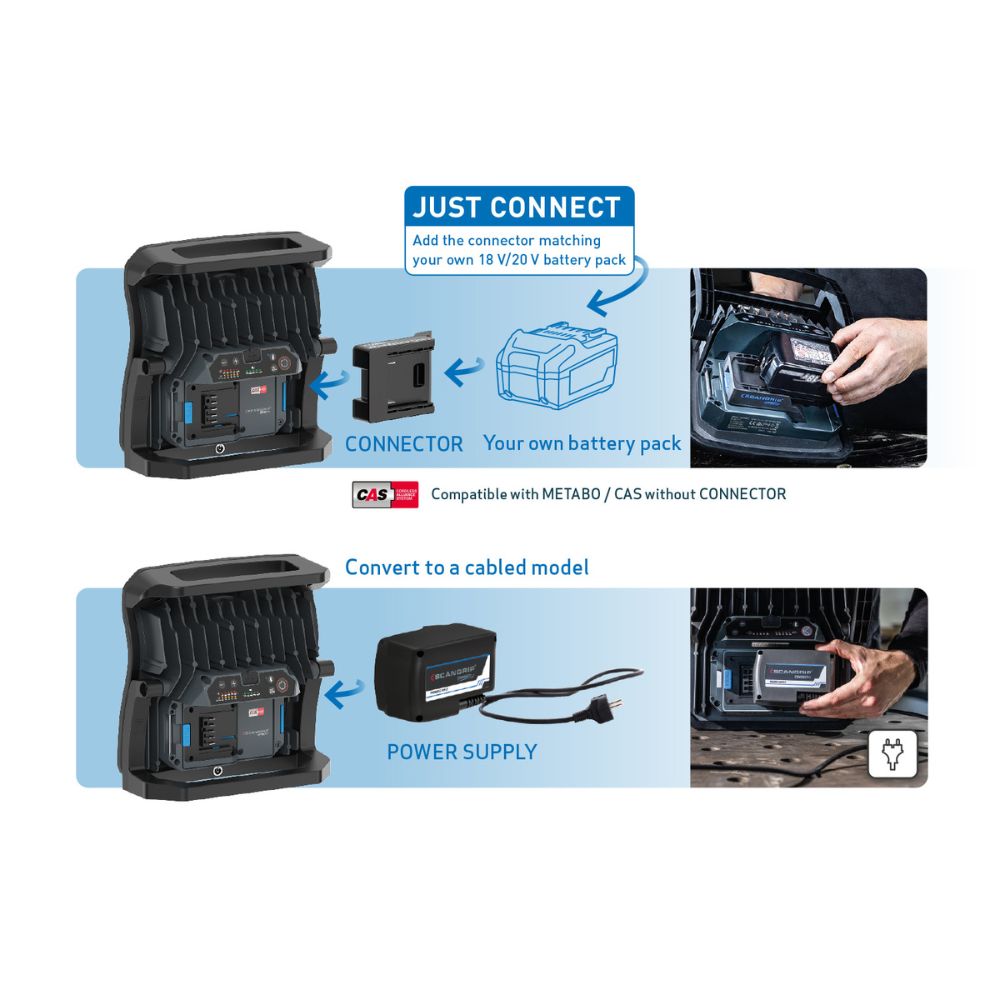
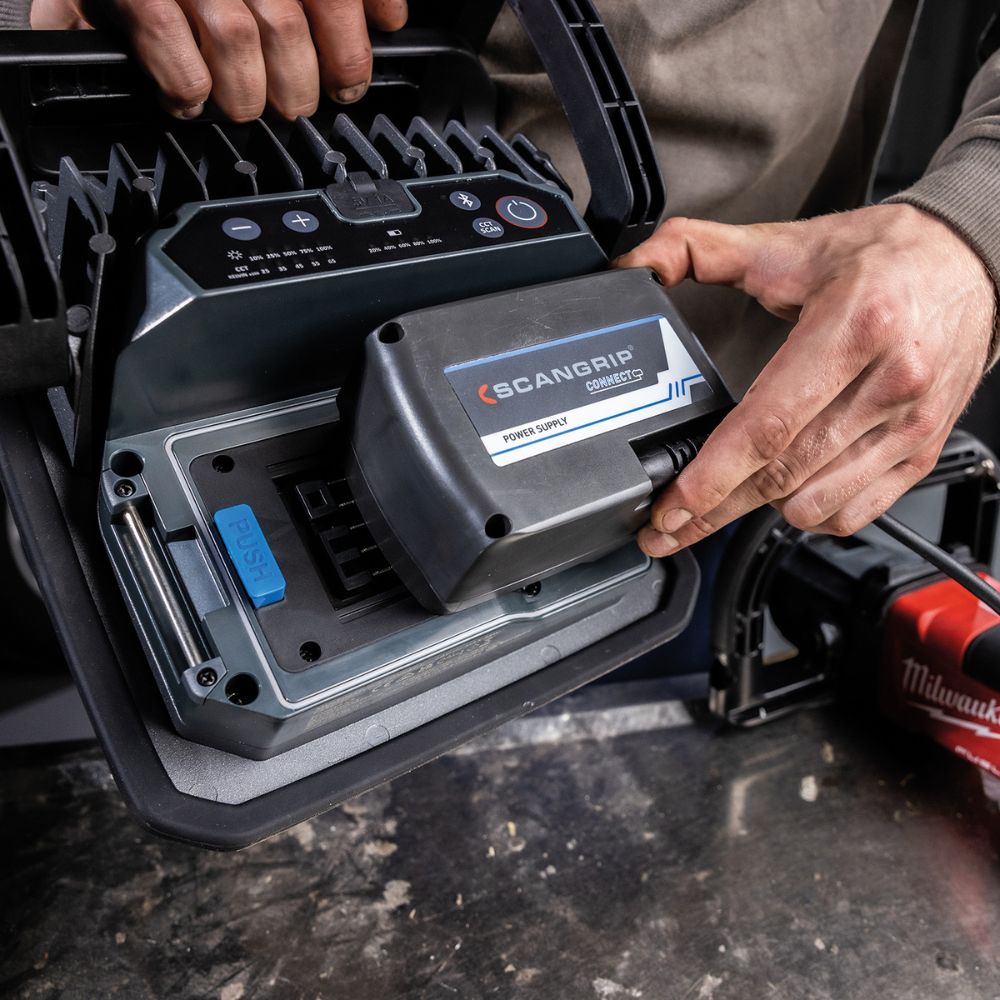
- Exchangeable battery system via the CONNECT platform
Power options (CONNECT system)
MULTIMATCH 3 CONNECT is compatible with 18V / 20V battery packs from leading power tool brands when used with the appropriate SCANGRIP CONNECTOR. Prefer unlimited runtime in the workshop? Add POWER SUPPLY CONNECT for direct power.
What’s in the box
- Lamp only plus manual
Important purchasing notes
- This listing is for the light only. Battery, charger, power supply module, and CONNECTOR are not included
- Choose the correct SCANGRIP CONNECTOR (sold separately) to match your battery platform
Quick specs
| Light output | Up to 3000 lm |
| Colour temperature | CCT SCAN 2500K to 6500K |
| Light control | Bluetooth app control |
| Power | CONNECT battery system (18V / 20V with connector) or POWER SUPPLY CONNECT |
Step 1: Ensure the detailing light is fully charged or has a charged battery installed.
Step 2: Select the appropriate Scangrip detailing light based on your task and lighting needs.
Step 3: Position the detailing light near the area you wish to illuminate, ensuring it's securely mounted on a stand or handheld, depending on the model.
Step 4: Turn on the detailing light using the provided controls or switches.
Step 5: Adjust the brightness and color temperature settings, if available, to suit your specific detailing task.
Step 6: Direct the light onto the surface you're working on, moving it as needed to reveal imperfections, swirl marks, or areas requiring attention.
Step 7: Complete your detailing work with precision, thanks to the accurate and powerful illumination provided by the Scangrip detailing light.
Step 8: After use, turn off the detailing light and store it in a safe place, keeping it clean and protected for the next use.