
Here is something most car owners don't realise: the majority of swirl marks, scratches, and surface marring on Australian cars are not caused by road debris or stone chips. They are caused by incorrect washing.
Automatic car washes with rotating brushes. Dragging a dirty sponge across the panel. Rinsing your mitt in the wash bucket and immediately using it again. Washing in full Queensland afternoon sun. These habits cause micro-abrasions that build up over time into the dull, cobweb-like scratches visible in direct light — and once they're there, the only way to remove them is machine polishing.
We've been helping Australians detail their cars properly since 2007. The safe wash process isn't complicated, but it does require the right equipment and a consistent technique. This guide covers everything you need to know.

Why Most Car Washes Cause Swirl Marks
Before getting into technique, it helps to understand exactly what causes swirl marks during washing.
Swirl marks are microscopic scratches in the clear coat caused by abrasive contact. When you drag a wash mitt or sponge across a panel, you're pushing any particle on the mitt across the paint surface. If that particle is a grain of dirt, a piece of grit, or road debris that hasn't been properly rinsed away, it acts like sandpaper — creating fine scratches that are invisible individually but cumulatively produce the hazy, dull appearance you see in bright light.
The key principle of scratch-free washing is simple: minimise the time any foreign particle spends moving across the paint surface.
Everything in the safe wash process — pre-washing, the two-bucket method, the correct mitt, the right shampoo — serves this principle.
What You'll Need Before You Start
You don't need a professional setup to wash correctly. Here is the essential equipment for a safe wash:
Two buckets — one for your shampoo solution, one for rinsing your mitt. Grit guards in both buckets are highly recommended (they trap dirt at the bottom so it doesn't get picked up when you dip the mitt back in).
A quality microfibre wash mitt — the single most important upgrade from a traditional sponge. Microfibre fibres lift dirt away from the paint surface and hold it in the fibres, rather than trapping it against the paint. Never use a sponge.
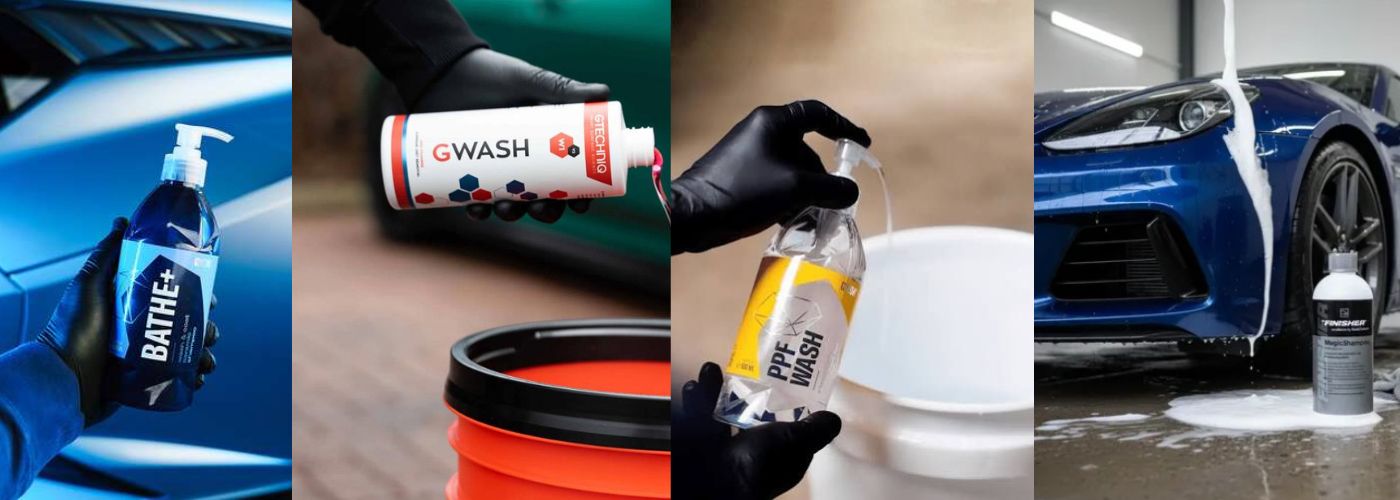
A pH-neutral car shampoo — see our guide to the best car shampoos in Australia for specific recommendations. For coated cars, use GYEON Q²M Bathe or similar.
A foam lance or snow foam pre-wash — not essential but strongly recommended. Snow foam applied before contact washing removes the bulk of loose dirt before your mitt ever touches the panel.
A dedicated car drying towel — either a large microfibre waffle-weave towel or a plush twisted-loop drying towel. Paper towels, chamois leather, and bath towels all cause scratches.
A pressure washer or garden hose — for rinsing. A pressure washer gives better results but is not required.
→ Shop wash mitts at CCP
→ Shop grit guards at CCP
→ Shop snow foam lances at CCP

Step 1: Set Up in the Shade (This Matters in Australia)
Before anything touches your car, positioning matters.
Wash in the shade, in the early morning, or in the late evening. In most Australian states — but particularly in Queensland, Western Australia, and South Australia through summer — washing in direct sunlight causes shampoo and rinse water to dry on the panel before you've worked through it. The minerals in that water, combined with heat, leave water spots and cause shampoo to bake onto the surface.
If you absolutely must wash in sunlight, work one panel at a time and keep the surface wet throughout.
The panels should ideally be cool to the touch before you start. Washing an engine-warm car causes product to flash-dry far more quickly.
Step 2: The Pre-Wash (Do Not Skip This)
The pre-wash is the most important step that most people skip entirely.
Before your wash mitt makes any contact with the paint, the goal is to remove as much loose contamination as possible through a contactless method. This means there's less debris available to cause scratches when you do start washing.
With a pressure washer and foam lance: Mix your snow foam product at the recommended dilution (most snow foams work well at 50–100ml per 700ml of water in the lance bottle). Apply a blanket of foam over the entire vehicle and allow it to dwell for 3–5 minutes. The foam lifts and encapsulates loose dirt. Rinse thoroughly before moving to the contact wash.
Without a pressure washer: A thorough rinse with a garden hose on full pressure, starting at the roof and working down, removes loose contamination effectively. Take your time — this is not a step to rush.
Recommended pre-wash products:
• GYEON Q²M Bathe+ can be used as a pre-wash applied via foam lance before the contact wash
• GYEON Q²M PPF Wash works particularly well as a pre-wash for vehicles with PPF or vinyl
→ Shop snow foam and pre-wash products at CCP

Step 3: Set Up Your Two Buckets
Fill one bucket with clean water and your shampoo at the correct dilution. For most pH-neutral shampoos, this is 15–30ml in a standard 10-litre bucket. Add agitation to build foam.
Fill the second bucket with clean water only. This is your rinse bucket.
Place a grit guard at the bottom of both buckets if you have them. The grit guard sits above the base of the bucket and creates a barrier that prevents dirt particles from being disturbed and picked up when you push your mitt down to load it with water.
The two-bucket system's logic is straightforward: you wash a panel, carry the dirty mitt to the rinse bucket, agitate it vigorously to release the dirt (which falls to the bottom, below the grit guard), then load it from the shampoo bucket and move to the next panel. You never return a dirty mitt to the shampoo solution.
This single change eliminates the most common cause of wash-induced swirl marks.
Step 4: Wash Top to Bottom, Panel by Panel
Load your wash mitt from the shampoo bucket and begin at the highest point of the car — the roof. Work in straight, overlapping strokes rather than circular motions. Circular washing creates circular scratches; straight strokes are less visible even if they do cause minor contact marks.
Apply light, consistent pressure. You are not scrubbing — the combination of good shampoo, good mitt, and good technique does the cleaning. Dragging the mitt harder does not clean better; it creates more risk.
Wash one panel completely, then rinse the mitt in the clean-water bucket before returning to the shampoo bucket. Move to the next panel.
Work in this order for maximum efficiency:
1. Roof
2. Bonnet
3. Upper doors and windows
4. Boot
5. Lower doors and quarter panels
6. Front bumper
7. Rear bumper
8. Wheels and tyres (always wash wheels last — they carry the most contamination)
Keep the vehicle wet while you wash. If panels start to dry before you rinse them, mist them with a hose to prevent water spotting.
Step 5: Wheels Last, Always
Wheels and wheel arches are the most contaminated parts of any car. Brake dust, road grime, and iron particles coat wheel surfaces in a way that would contaminate your paint wash equipment immediately if you used the same tools.
Always wash your wheels separately, after the paint wash, using a dedicated wheel brush and bucket. Never use your wash mitt on the wheels and then return it to the paint wash setup.
For brake dust removal, an iron-reactive wheel cleaner applied before brushing dramatically reduces the scrubbing effort required and avoids scratching wheel surfaces.
→ Shop wheel cleaning brushes at CCP
→ Shop wheel cleaners at CCP
Step 6: Rinse Thoroughly
Rinse the entire vehicle from top to bottom with clean water. The goal is to remove all shampoo residue without leaving anything that could dry and mark the surface.
If using a pressure washer, keep a reasonable distance from the panel — particularly on PPF-coated cars where sustained high pressure close to film edges can cause lifting over time.
On ceramic-coated cars, you may notice water sheeting dramatically off the surface during the rinse. This is your coating performing exactly as intended.
Step 7: Dry Correctly
Incorrect drying causes almost as many scratches as incorrect washing. The key principles are the same — clean equipment, light pressure, minimal dragging of particles.
Use a dedicated microfibre drying towel. Waffle-weave towels are excellent for absorbing large amounts of water quickly. Twisted-loop plush towels are gentler and produce an excellent finish. Never use a chamois leather (it traps grit), paper towels (too abrasive), or a regular bath towel.
Lay the towel flat on the panel and drag gently, rather than pressing and rubbing. Allow the microfibre to absorb water through contact rather than pressure.
Work top to bottom again — dry the roof first so water dripping from it doesn't fall on panels you've already dried.
For coated cars in particular, a quick detailer or spray sealant applied to the final panel and buffed with a clean microfibre cloth adds a layer of protection after each wash and enhances the depth of the coating's gloss.
→ Shop drying towels at CCP

Common Australian Washing Mistakes to Avoid
Washing in direct midday sun. Products dry on panels before you've rinsed, leaving marks and potentially causing etching in high temperatures. Particularly problematic in Brisbane, Perth, and Darwin through summer.
Using automatic car washes with rotating brushes. The brushes in tunnel car washes are not cleaned between vehicles. They carry the contamination of every car they've touched directly onto your paint. If you use car washes, choose a touchless (jet wash only) option.
Washing with a sponge. Sponges trap grit against the paint surface. Switch to a quality microfibre wash mitt.
Reusing a dirty microfibre cloth for drying. Drying cloths accumulate contamination over their working life. If yours feels rough or looks discoloured, wash it before using it on paint.
Leaving bird droppings or tree sap to dry. Australian bird droppings (particularly from fruit bats and native birds) are highly acidic and can etch clear coat within hours in hot weather. Remove them immediately with a quick detailer spray and a clean microfibre cloth — do not rub dry; mist first to soften.
Washing without rinsing the mitt between panels. The two-bucket method only works if you use it consistently. Skipping the rinse step defeats the entire purpose.
The Seasonal Context: Australia-Specific Advice
Summer (December–February): Avoid all midday washing. Early morning before 8am or evening after 6pm is the window. Bird droppings are more frequent and more damaging in summer heat — check your bonnet and roof daily and spot-treat as needed.
Autumn (March–May): Falling leaves and tree sap are the main concern. Park away from trees where possible. This is also the best time in most states to apply or refresh ceramic coating before winter.
Winter (June–August): Coastal Australians deal with increased salt air. Those in alpine areas (ACT, Victorian High Country) face road salt from gritting treatments. Both accelerate contamination of paint and wheels — wash more frequently in these conditions and ensure your wheel cleaner is iron-reactive.
Spring (September–November): Pollen season in most Australian cities. Pollen is mildly acidic and can stain paint if left to accumulate over multiple wash cycles. Weekly washing is recommended through peak spring pollen periods in Melbourne, Canberra, and Adelaide.
A Note on Ceramic Coatings and Washing
If your car is ceramic-coated, the safe wash process above is even more important — not because the coating is fragile, but because you're protecting an investment.
Use a pH-neutral shampoo only (see our shampoo guide). Avoid "wash and wax" products that contain fillers or gloss enhancers. Never use abrasive compounds in your wash bucket.
Coated cars reward correct washing technique with dramatically easier maintenance — contamination releases more readily, drying is faster, and water spots are less likely to form. The coating cannot protect against scratches from an incorrect wash method, however. Swirl marks from poor technique on a ceramic-coated car still require polishing to remove.
Summary: The Safe Wash Checklist
Before every wash:
• Choose a shaded location or early morning / evening timing
• Panels are cool to the touch
• Two buckets set up with grit guards
• Wash mitt is clean
• Drying towel is clean and dry
The wash:
• Pre-wash / snow foam applied and rinsed
• Wash from top to bottom, panel by panel
• Rinse mitt in clean-water bucket between panels
• Wheels washed separately, last
• Full rinse top to bottom
• Dry with clean microfibre towel, top to bottom
Optional finishing:
• Quick detailer or spray sealant applied after drying
• Spot treat any bird droppings or sap found during the wash
Frequently Asked Questions
How often should I wash my car in Australia?
For most daily drivers, once a week or once a fortnight is appropriate. Cars parked outdoors in coastal areas, under trees, or in high-dust environments benefit from more frequent washing. The key rule is not to let contamination accumulate — bird droppings, tree sap, and industrial fallout become progressively harder to remove and increasingly damaging the longer they sit.
Is it safe to use a pressure washer on a ceramic-coated car?
Yes, with sensible technique. Avoid sustained high pressure aimed directly at PPF film edges. For all other surfaces, a pressure washer used at a reasonable distance (30–50cm from the panel) is safe and effective. Do not use a jet wash on fresh PPF within the first 48 hours of installation.
Do I need a foam lance to wash safely?
No — a foam lance makes pre-washing easier and more effective, but a thorough rinse with a garden hose achieves the same goal of removing loose contamination before the contact wash. The two-bucket method and correct mitt technique matter more.
What's the best way to remove bird droppings between washes?
Keep a bottle of quick detailer spray and a clean microfibre cloth in the car. Mist the affected area, allow it to soften for 30 seconds, then gently wipe. Do not rub a dry dropping — this will scratch. For dried, baked-on droppings in hot Australian conditions, a dedicated bird dropping remover spray is more effective than a general quick detailer.
Can I use dish soap in a pinch?
Dish soap is alkaline and will strip wax, sealant, and ceramic coatings. Use a dedicated car shampoo. If you have nothing else available, rinsing the car with water and drying it is safer than using dish soap.
Will a ceramic coating prevent swirl marks from washing?
A ceramic coating provides some additional hardness to the surface, but it does not make the car immune to wash-induced scratches. Correct washing technique is required regardless of whether the car is coated or uncoated.
My car is already full of swirl marks. What do I do?
Swirl marks can only be removed by machine polishing. Browse our polishing and compounds range or contact our showrooms for advice on the right approach for your vehicle.
Car Care Products Australia has been supplying Australian detailers with the world's best car care products since 2007. We operate showrooms in Sydney and Brisbane and deliver Australia-wide.
→ Browse our full range of car shampoos
→ Speak to a product expert: 1300 006 007